Launch: Faraday predictions now in Zapier
Zapier is everybody's favorite workflow automation tool. Now, you can retreive predictions from Faraday in your Zaps.


I've always loved Zapier. It really does feel like a superpower to set up a workflow with a zap: the gift that keeps on giving. This section has been on their homepage longer than anything else and I can see why — Zapier users all feel this way.
That's why I'm so excited and proud to share that you can now incorporate Faraday predictions into your zaps. With this new integration, you can score leads, assign customers to personas, make product recommendations to shoppers, forecast spend, and more, all within your automated Zapier workflows.
Predictions are the key to improving customer engagement throughout the lifecycle—you can personalize outreach, customize offers, prioritize better opportunities—the list goes on.
Working through an example Zap with Faraday predictions
Let's say we want to score new leads when they arrive in HubSpot, evaluating them for their likelihood to close and assigning them to a persona. This way, you'll be able to tailor your handling of these leads differently according to their predictions.
Faraday setup
We'll assume you already have basic customer and lead data, along with their respective cohorts, set up in your Faraday account. If you're new to Faraday, check out the docs and Faraday Academy to get up to speed.
Next, you'll need to set up your two predictions if you don't have them already:
Finally, if you don't already have it, create a pipeline to get these predictions deployed:
- Population – everybody
- Payload – the two predictions above
- Deployment – Lookup API
That last bullet is important to get things working right on Zapier.
Creating your zap with Zapier
I love Zapier's new LLM interface for creating zaps, and it works great here. Just head to your dashboard and type "When a new lead comes into HubSpot, score it using Faraday," like so:
Zapier should automatically calculate your zap template for you—something like this:
Hit that "Try it" button. This should load the template up in the zap editor, which will look something like this:
Click the HubSpot box to pull up settings for this trigger step. You'll have to choose your HubSpot account and then pick your lead capture form from the dropdown. It will look like this:
Hit the test button, and it will find a recent lead from your form data. When you hit continue, you'll make your way into the Faraday action step settings.
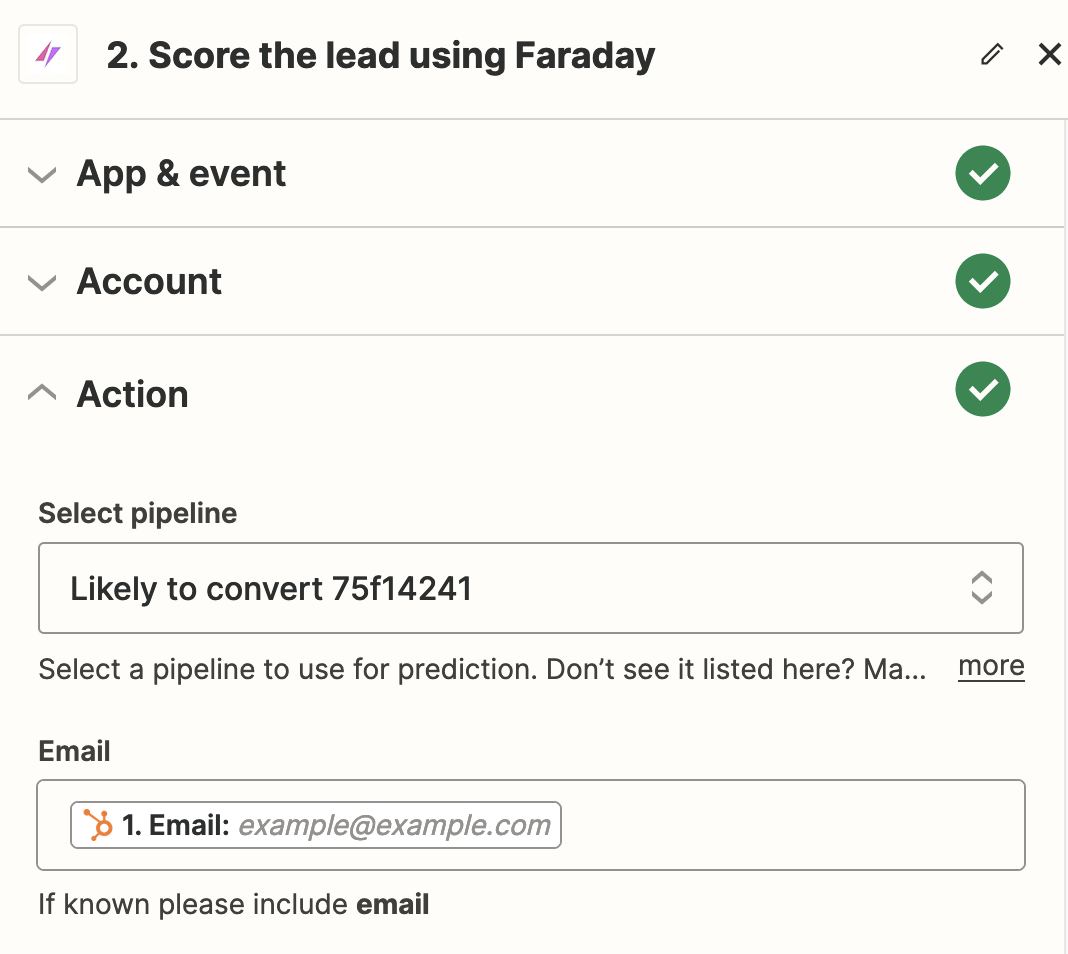
Choose or add your Faraday account (you'll need your Faraday API key for this), then proceed to the Action section. In the "Select pipeline" dropdown, choose the pipeline you created earlier. If it's not on the list, make sure your Lookup API deployment was properly added to this pipeline in Faraday.
Then, use the form data from HubSpot to fill out as many of the identity fields as you can. In this case, we capture email in our lead form, so I'm using that (actually, the Zapier LLM had that preconfigured for me ✨):
After testing what you've got so far, it's time to store your predictions for this new lead somewhere. You could put them back in HubSpot with an "Update Contact" action, or whatever you'd like. Then publish your zap and you're all set!
Ready to try Faraday with Zapier? Create a free account to get started today.

Andy Rossmeissl
Andy Rossmeissl is Faraday’s CEO and leads the product team in building the world’s leading context platform. An expert in the application of data analysis and machine learning to difficult business challenges, Andy has been running technology startups for almost 20 years. He attended Middlebury College and lives with his wife in Vermont where he lifts weights, makes music, and plays Magic: the Gathering.

Ready for easy AI?
Skip the ML struggle and focus on your downstream application. We have built-in demographic data so you can get started with just your PII.


